File Sharing Protocol
File sharing protocols allow you to share files stored on your Bianbu NAS with other devices on the same local network — this is one of the core features of any NAS product. These protocols typically run as systemd services on the system, so they’re often referred to as file-sharing services.
In this section, we’ll use SMB as an example to walk through the file-sharing setup process. Other protocols can be configured in a similar way.
Tip: Bianbu OS comes with Openmediavault pre-installed, offering full NAS functionality. This guide gives a simplified overview. For more advanced settings, check out the Openmediavault official site.
Server-Side Setup
Set the Hostname
For SMB to work properly, the hostname must be 15 characters or fewer. It’s a good idea to give your NAS a short and memorable name. This step isn’t required for other file-sharing services.
Note: Changing the hostname may cause the system to request a new IP address via DHCP. If your web interface becomes unreachable afterward, double-check the new IP and log in again.
Steps:
- Log in to the Openmediavault web interface.
- Go to Network → General, enter the new hostname, and click Save.
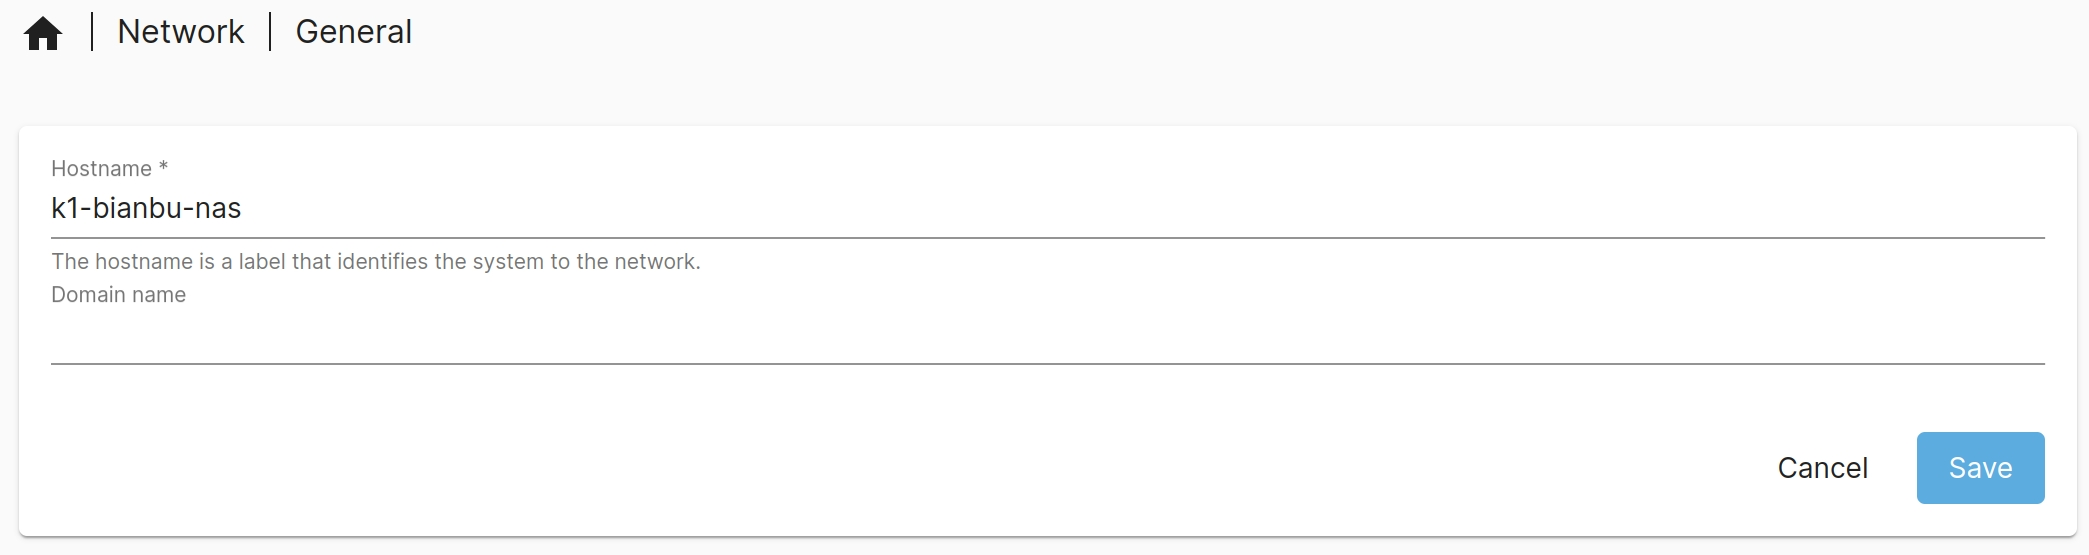
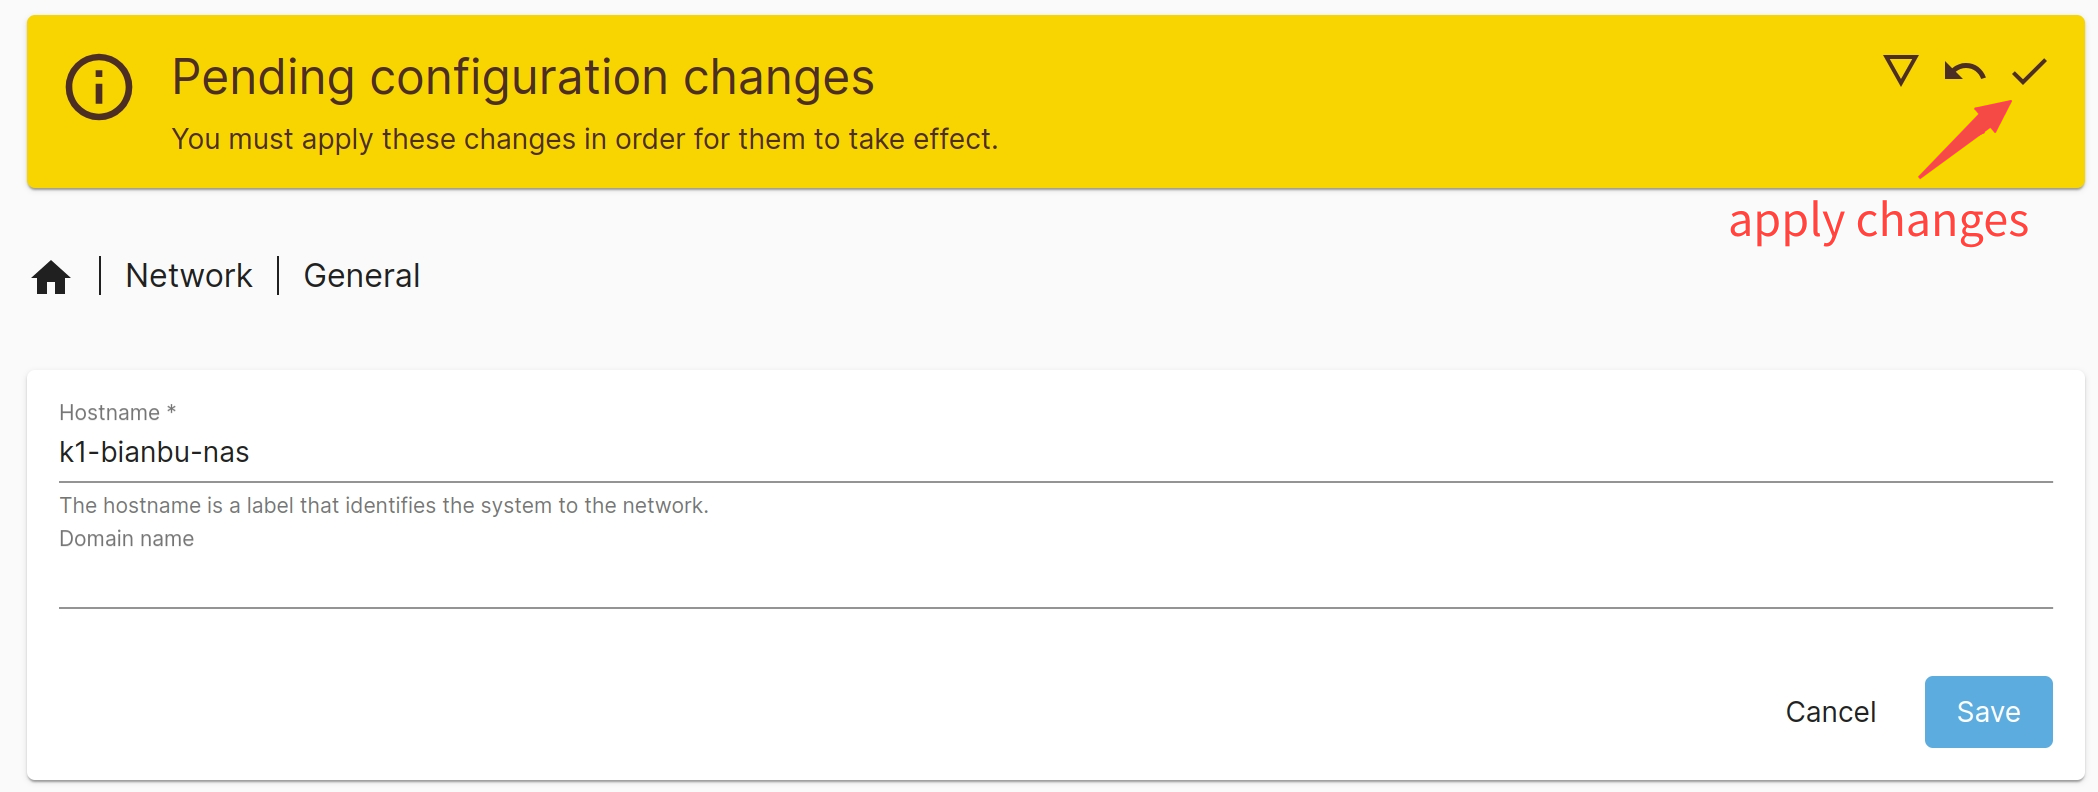
- A yellow banner will appear at the top with a pending change notice. Click the ✔ icon to apply the changes.
Mount Mount a Drive
To share storage, you first need to mount a physical hard drive or SSD to the system. If the target partition is unformatted, format it first (Warning: formatting will erase all data).
Steps:
-
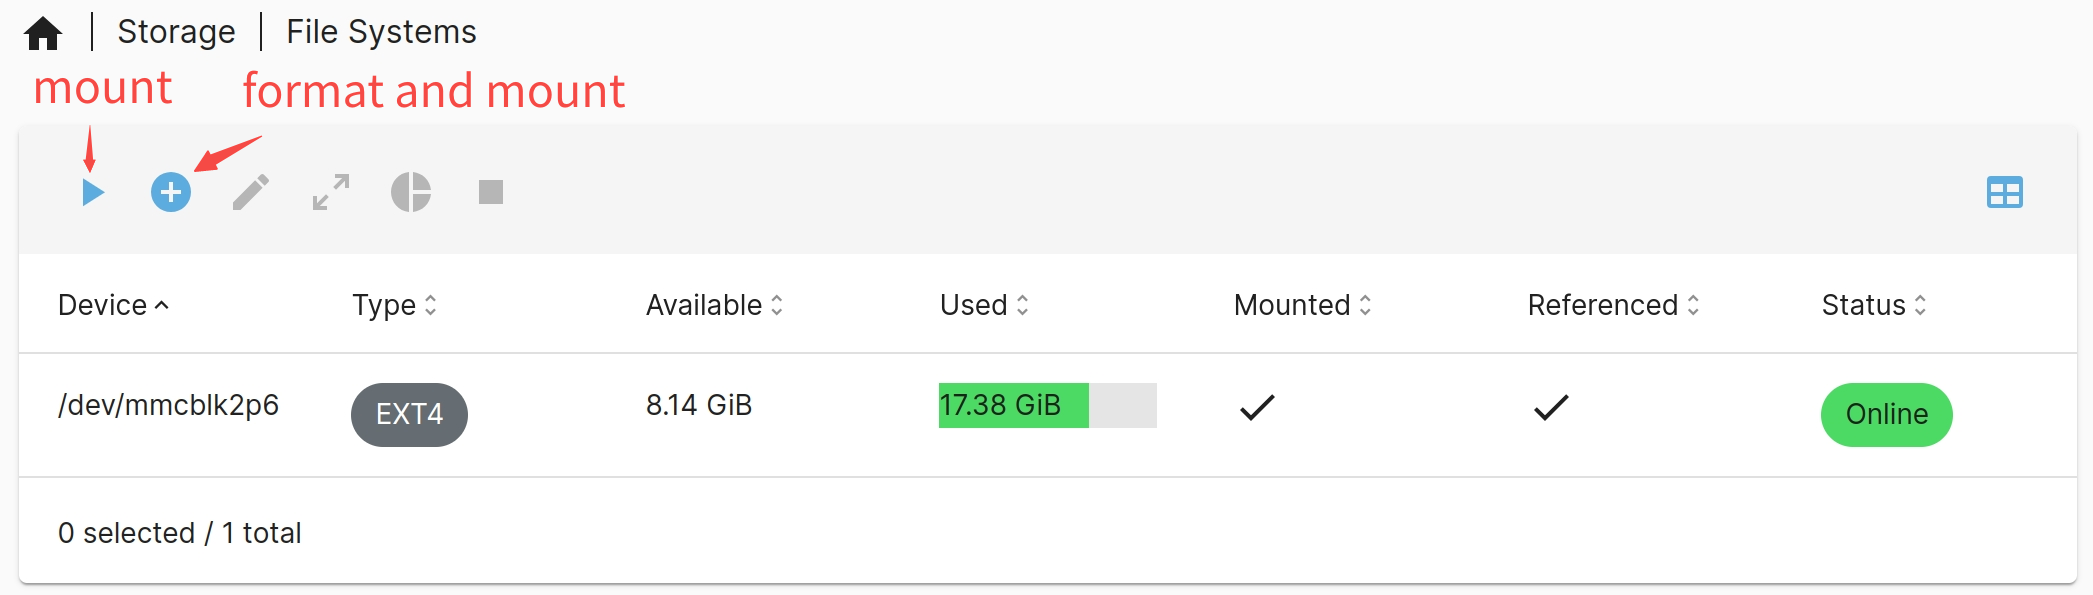
Go to Storage → File Systems, select the target disk:
- Click
 to mount an existing file system.
 - Click
 to create and mount a new file system (only if formatting is needed).
- Click
Create a Shared Folder
After mounting a drive, you need to create a shared folder. This helps manage permissions and keep data organized.
Steps:
- Go to Storage → Shared Folders, then click to create a new folder. Set the name, select the drive, and define access permissions.
Example: create a folder called
smb-share

Set Up the SMB Service
Steps:
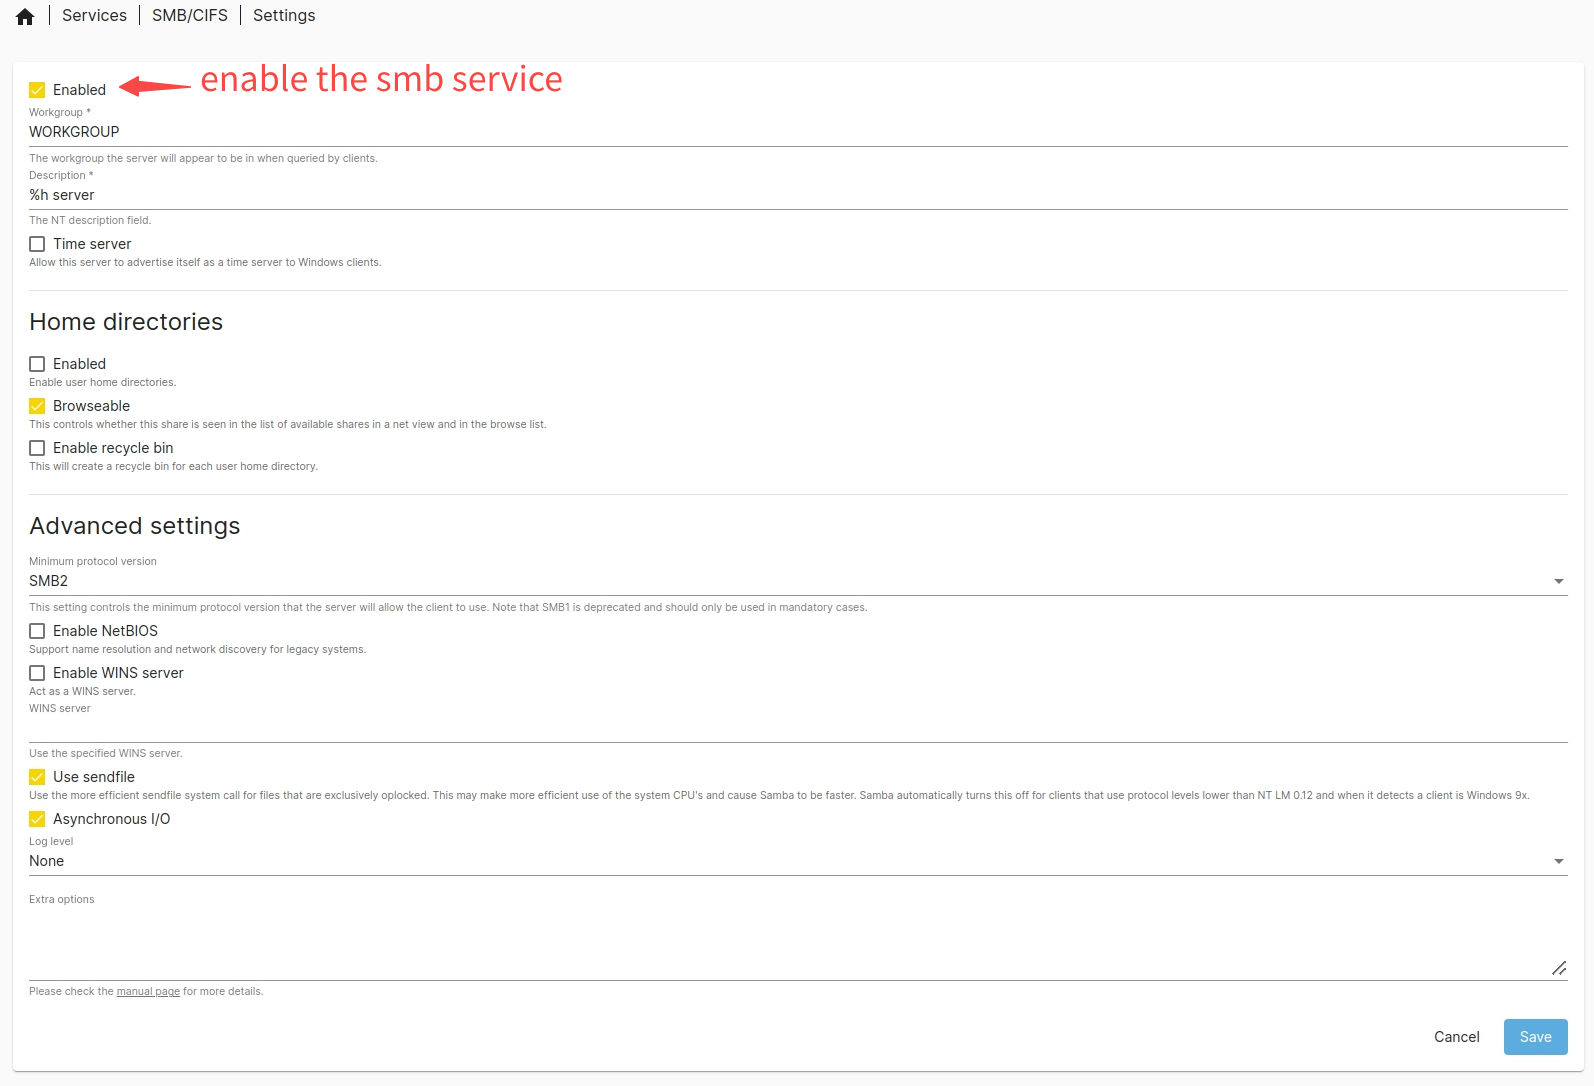
- Enable SMB and configure global settings: Go to Services → SMB/CIFS → Settings, fill in the workgroup name, protocol version, etc. → Click Save → Apply the changes.
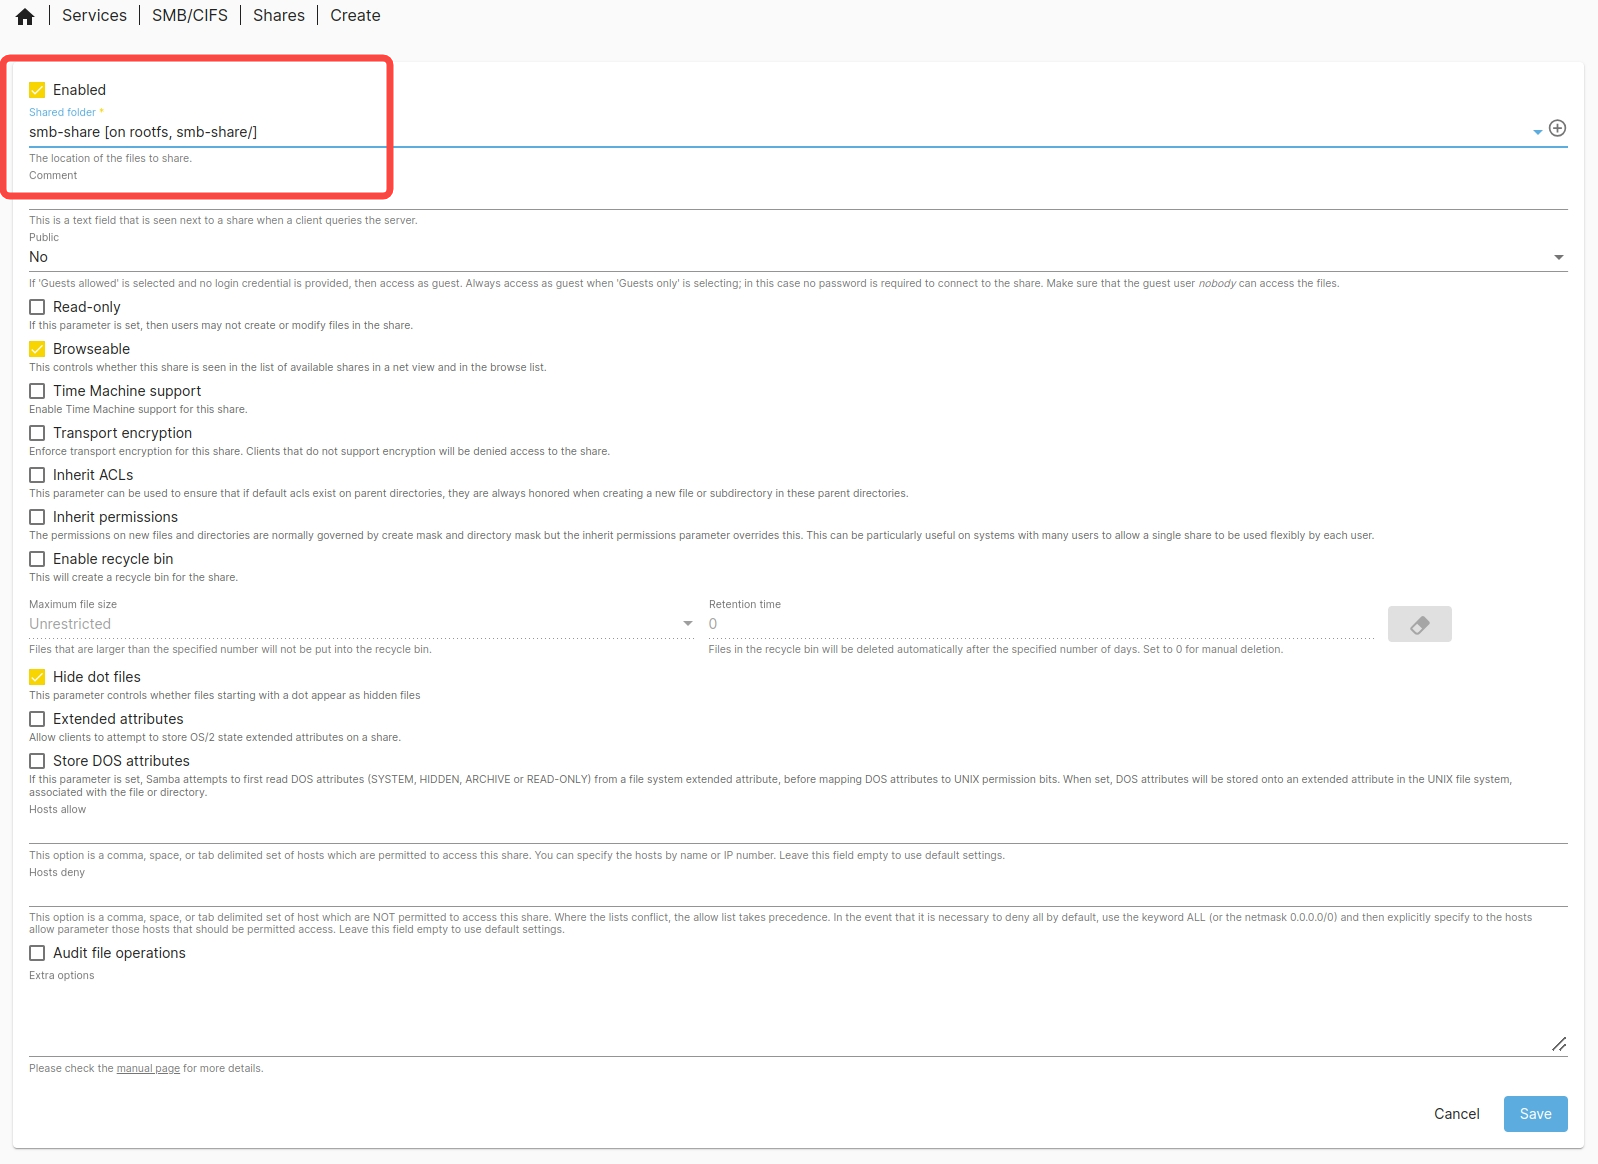
- Publish the shared folder:
Go to Services → SMB/CIFS → Shares, select
smb-share→ Click Save → Apply the changes.
Set User Permissions
Make sure remote users have permission to access the shared folder. Here's how to create a user bianbu with the same password.
Steps:
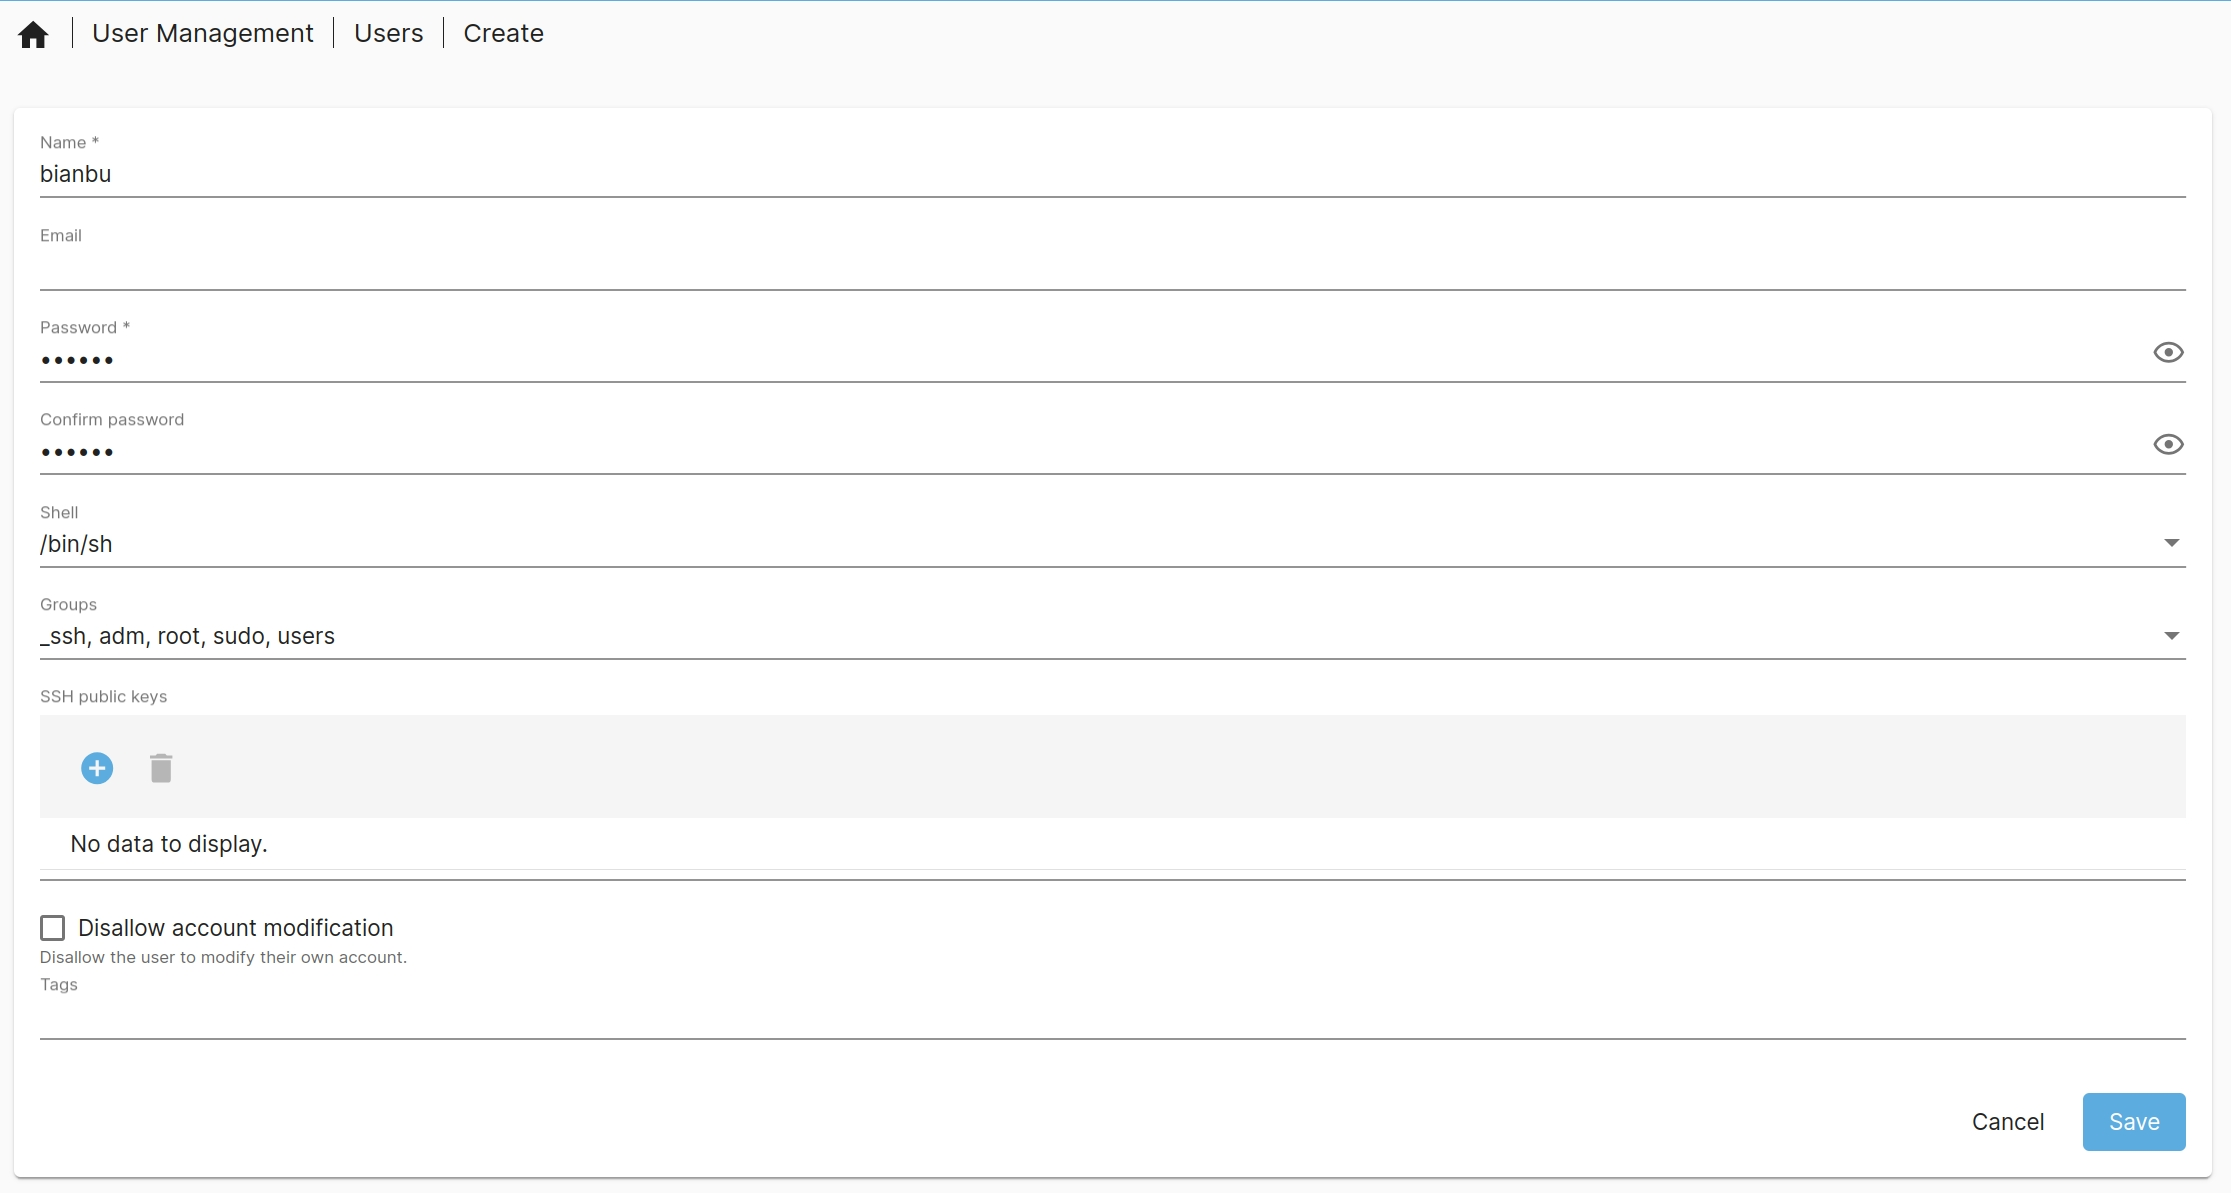
- Create a user:
Go to Users → Users, then click to add a new user.
For example, you can create a user named
bianbuwith the username and password both set tobianbu.
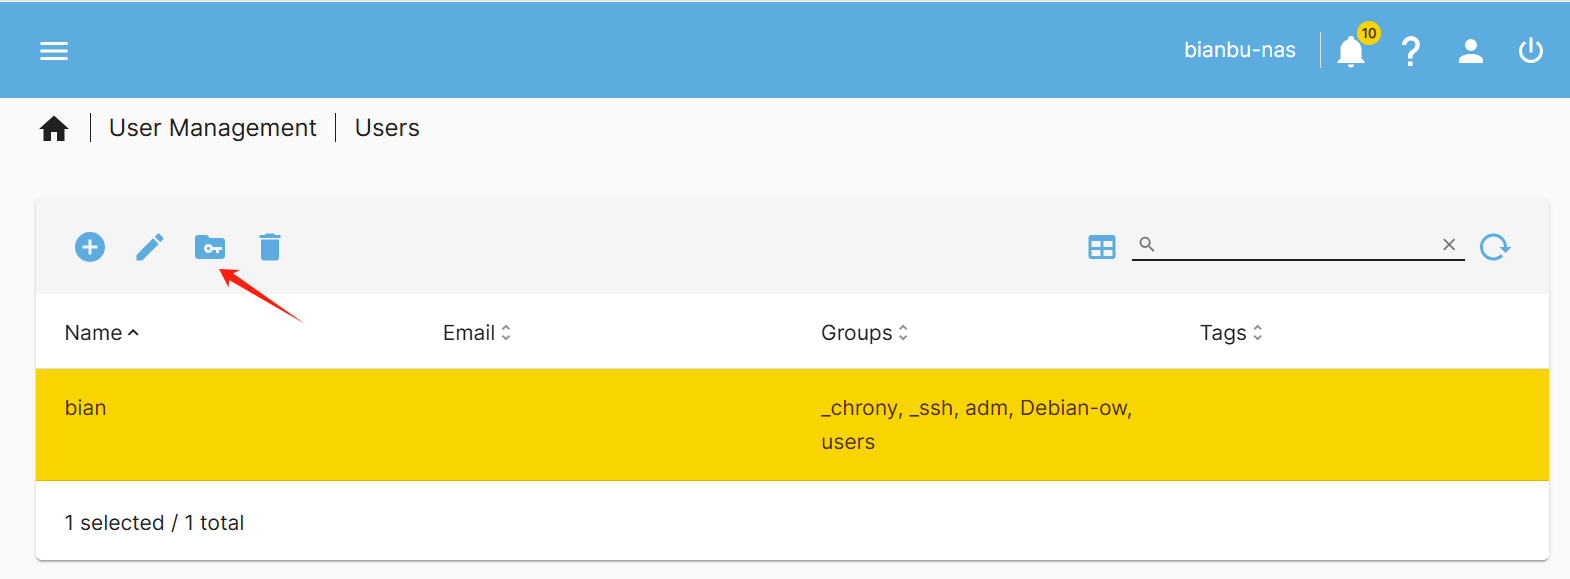
- Set folder permissions:
Click any user in the list, then "Permissions"
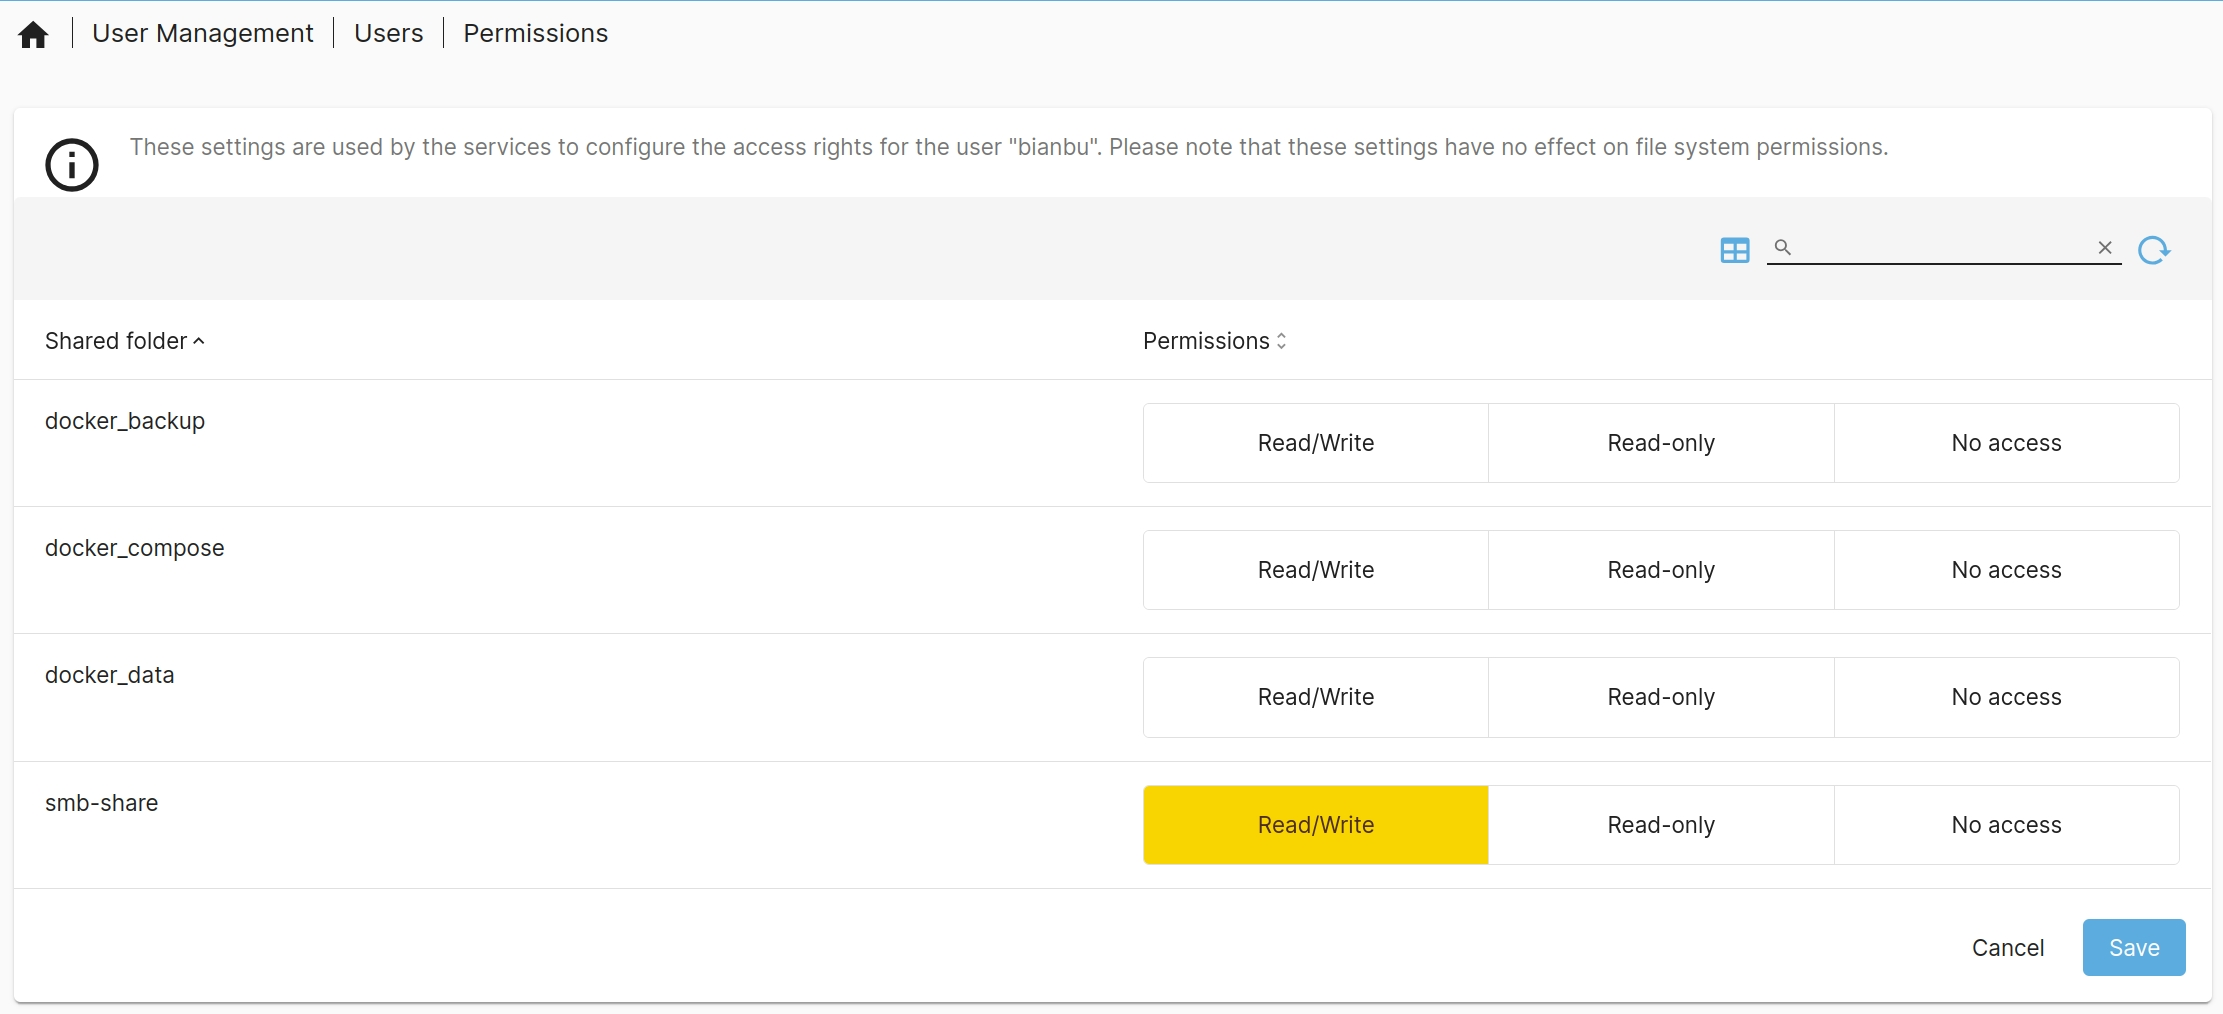
 to assign the user permissions for the shared folder.
For example, grant the bianbu user read and write access to the smb-share folder.
Client Connection
This section outlines how to connect different clients to the SMB service. The setup assumes the following:
- Server IP:
HOST_IP - Shared folder:
smb-share - Username:
bianbu - Password:
bianbu
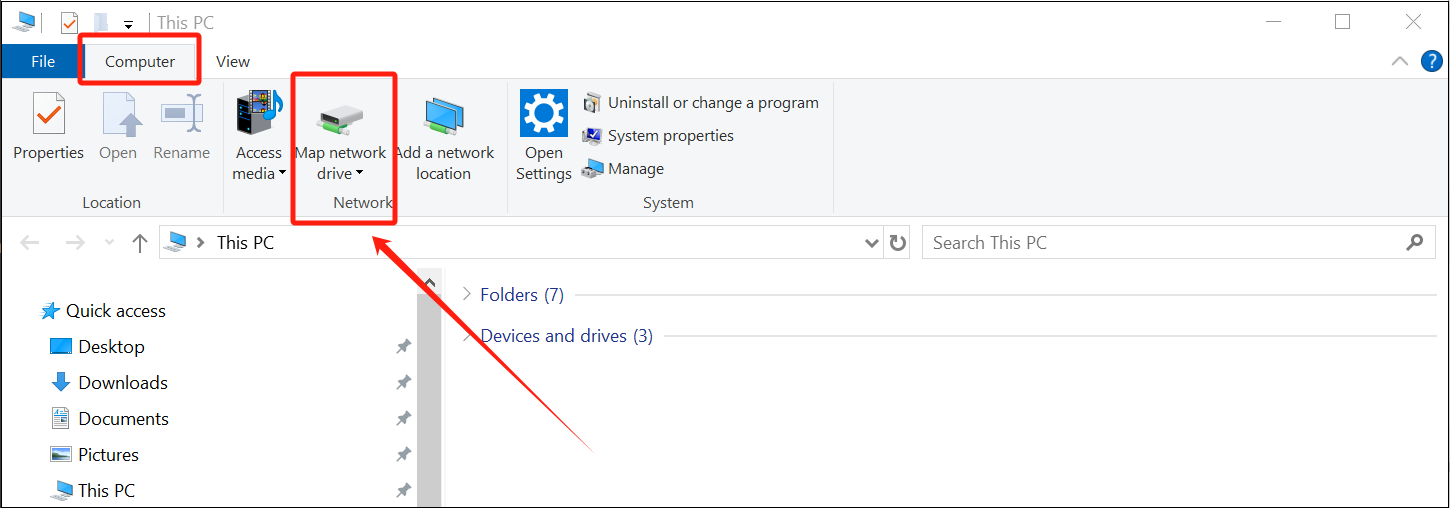
Windows File Explorer
-
Open “This PC” → Click Computer tab → Map network drive
-
Enter the path:
\\HOST_IP\smb-share
Linux Nautilus File Manager
Open Nautilus, then select "Other Locations" and enter the shared folder address:
smb://HOST_IP/smb-share
Linux CLI
Mount via command line:
mount.cifs //{HOST_IP}/smb-share /your_mount_path -o user=bianbu,password=bianbu