3.1.3 Using a USB Camera with Python
Last Version: 10/09/2025
This guide shows how to connect a USB camera, identify the correct device node, and capture and display video frames using Python.
Hardware Connection
-
Connect your USB camera to the development board:
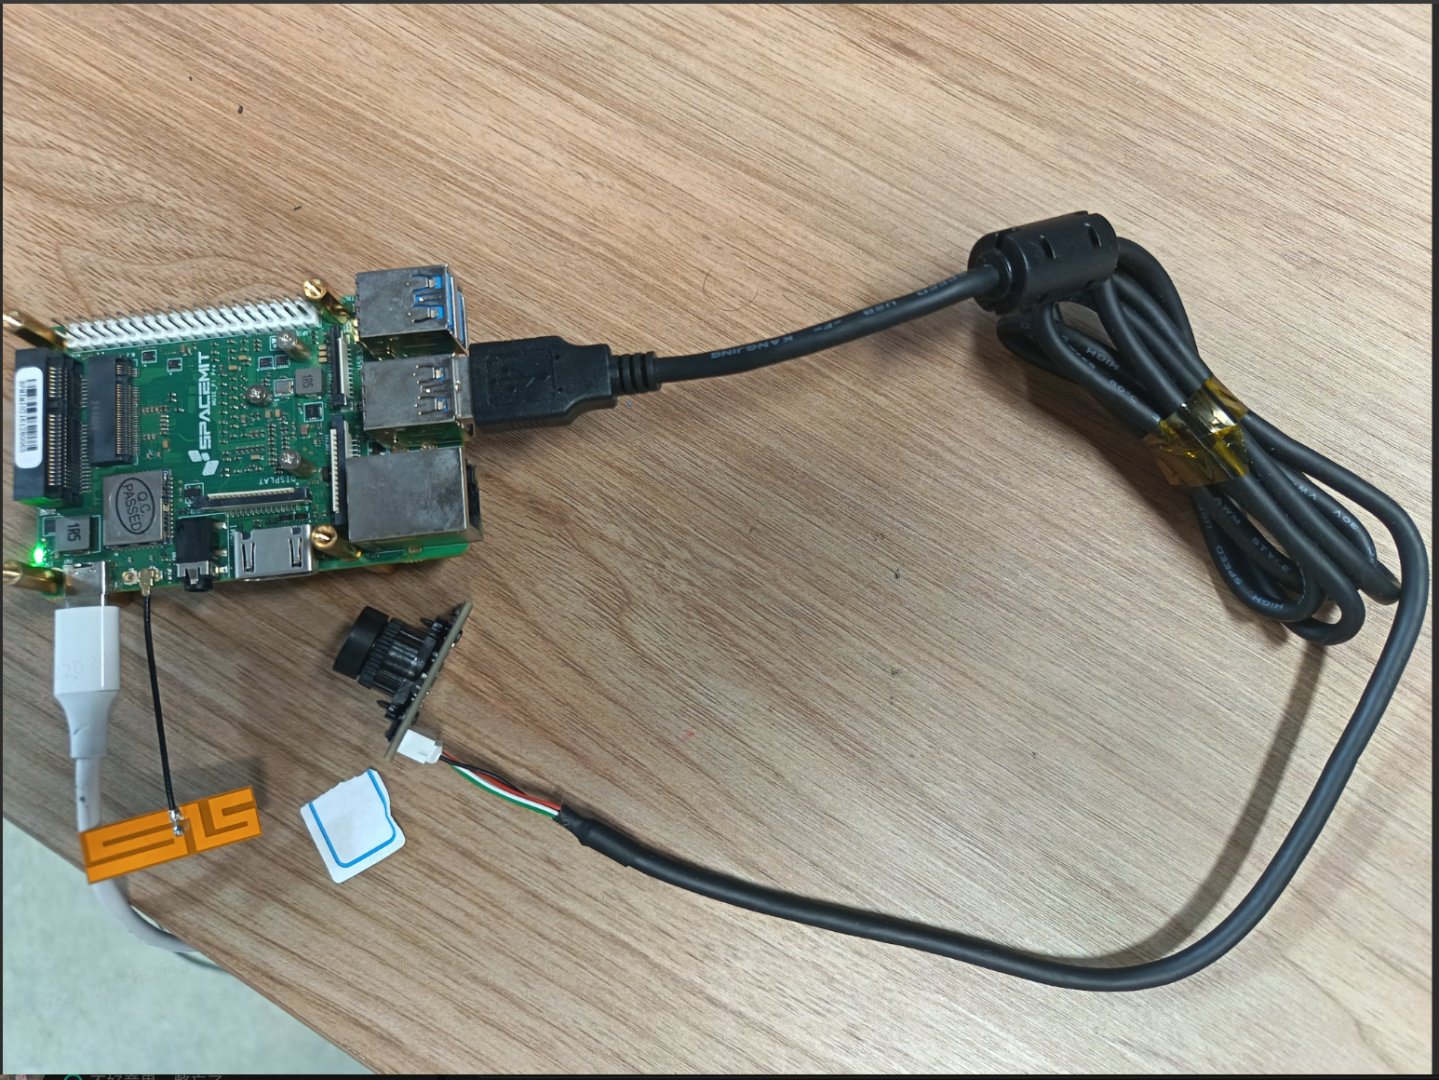
-
Connect the board to a monitor via HDMI cable to view the video output
Check Device Number
-
List all video devices:
ls /dev/video*Example output:

-
Unplug the camera and list again:
ls /dev/video*Example output:

- In this example,
/dev/video20and/dev/video21are detected. - It is recommended to use the lower-numbered device (here
/dev/video20) for capturing video frames.
- In this example,
Optional: Verify with v4l2-ctl tool:
-
List all devices:
v4l2-ctl --list-devicesExample output:

-
Check the details of
/dev/video20:v4l2-ctl -d /dev/video20 --allIf you see a Video Capture field, this node is for capturing video frames:
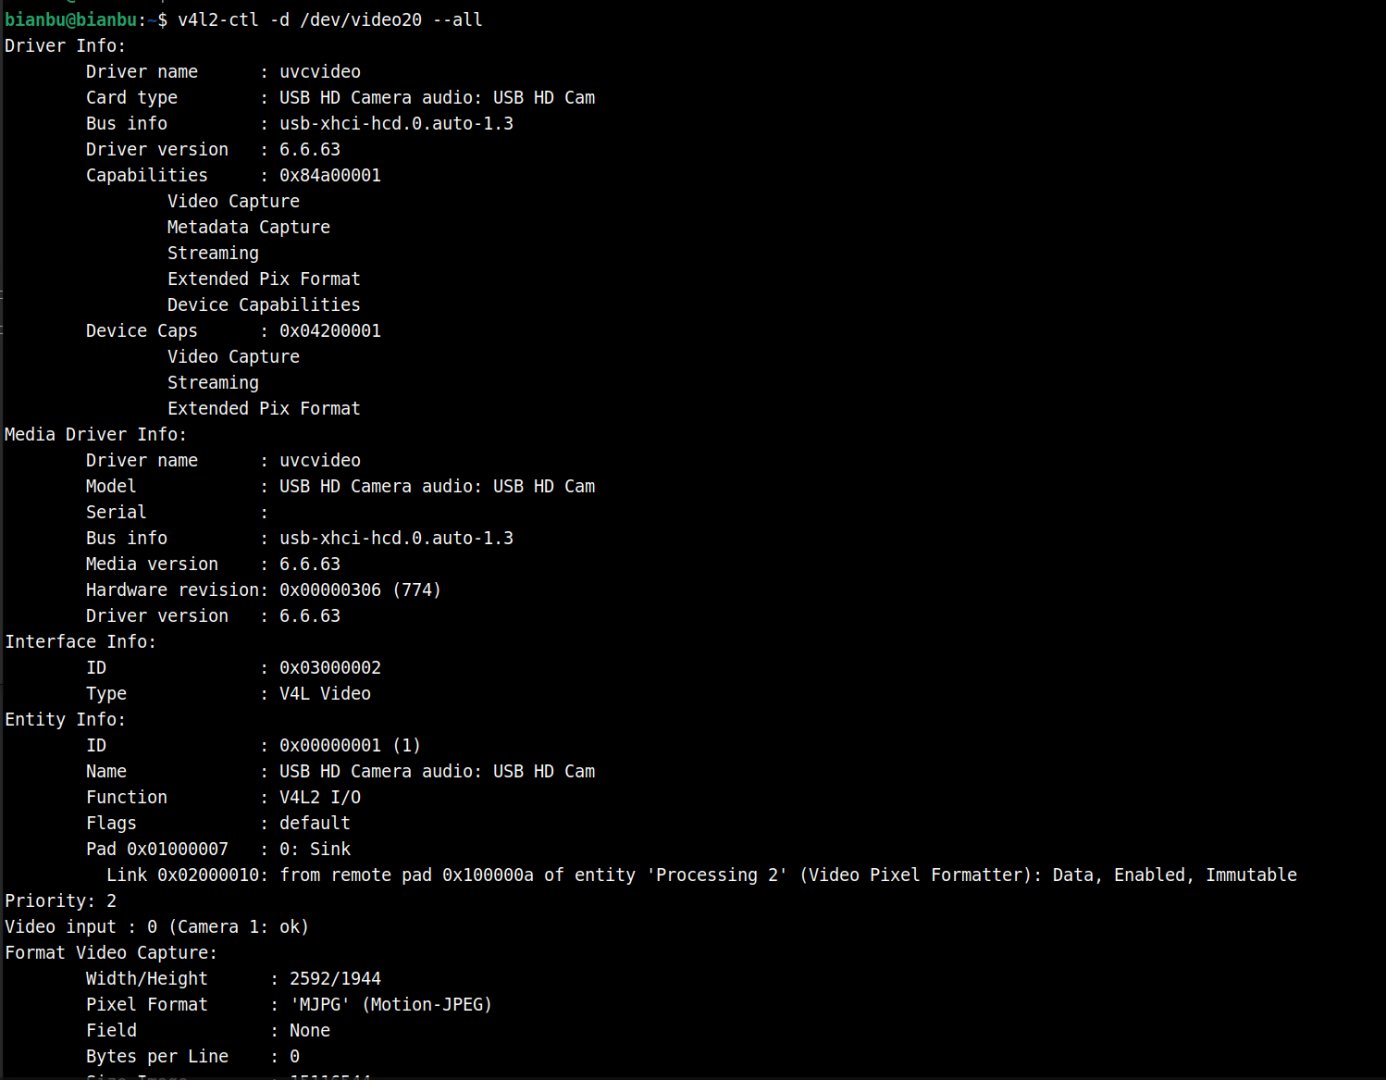
-
Check the details of
/dev/video21:v4l2-ctl -d /dev/video21 --all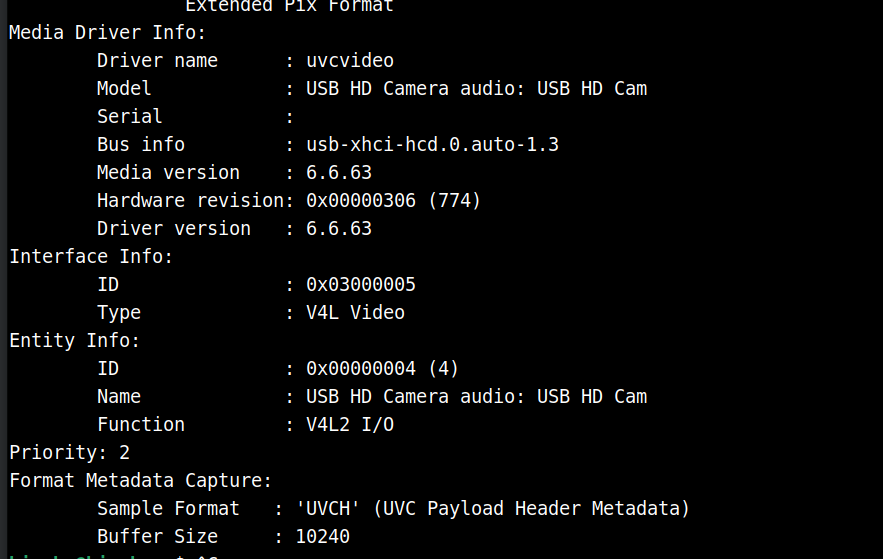
In this case, the output contains UVC Payload Header Metadata, this node captures video metadata, not video frames.
Set Up a Python Virtual Environment
python3 -m venv ~/test1
source ~/test1/bin/activate
pip install opencv-python
Capture & Display Video
Save the following code as opencv_test.py:
import cv2

# Open the camera, 0 is the default device index; if multiple cameras exist, change to 1, 2, etc.
cap = cv2.VideoCapture('/dev/video20')

# Check if successfully opened
if not cap.isOpened():
    print("Unable to open camera")
    exit()

while True:
    # Read a frame
    ret, frame = cap.read()
    if not ret:
        print("Unable to receive frame, exiting...")
        break

    # Display the frame
    cv2.imshow('USB Camera', frame)

    # Press 'q' key to exit
    if cv2.waitKey(1) & 0xFF == ord('q'):
        break

# Release resources
cap.release()
cv2.destroyAllWindows()
Run inside the virtual environment:
python opencv_test.py
Note: Always use the full device path (e.g., /dev/video20) in VideoCapture(). Do not use the plain number 20.