YOLOE 物体检测
最新版本:2025/09/12
YOLOE 简介
YOLOE (Real-Time Seeing Anything) 是零样本、可提示 YOLO 模型的一项新进展,专为 开放词汇表 检测和分割而设计。 与之前仅限于固定类别的 YOLO 模型不同,YOLOE 使用文本、图像或内部词汇表提示,从而能够实时检测任何对象类别。 YOLOE 基于 YOLOv10 构建,并受到 YOLO-World 的启发,以最小的速度和准确性影响实现了 最先进的零样本性能。
本示例展示如何基于 SpacemiT 智算核,使用图片或视频流作为输入,执行 YOLOE 模型的推理,并通过 ROS 2 发布检测结果。
环境准备
安装依赖
sudo apt install python3-venv python3-pip ros-humble-camera-info-manager \
ros-humble-image-transport python3-spacemit-ort
导入 ROS2 环境
source /opt/bros/humble/setup.bash
准备虚拟环境
python3 -m venv ~/yoloe_env
source ~/yoloe_env/bin/activate
pip install -r /opt/bros/humble/share/jobot_yoloe_py/data/requirements.txt
export PYTHONPATH="$HOME/yoloe_env/lib/python3.12/site-packages":$PYTHONPATH
图片推理
准备图片
cp /opt/bros/humble/share/jobot_yoloe_py/data/bus.jpg .
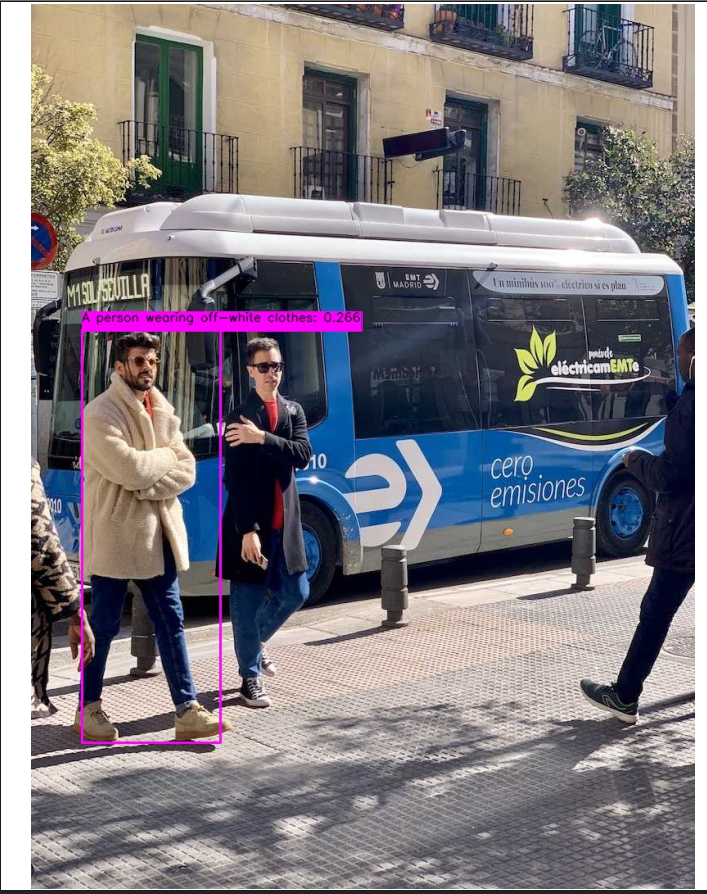
本地保存推理结果
ros2 launch rdk_perception yoloe_infer_img.launch.py \
img_path:=/home/bianbu/bus.jpg \
text_prompt:="A person wearing off-white clothes"
输出结果将保存在当前目录的 yoloe_result.jpg 中,如图所示。
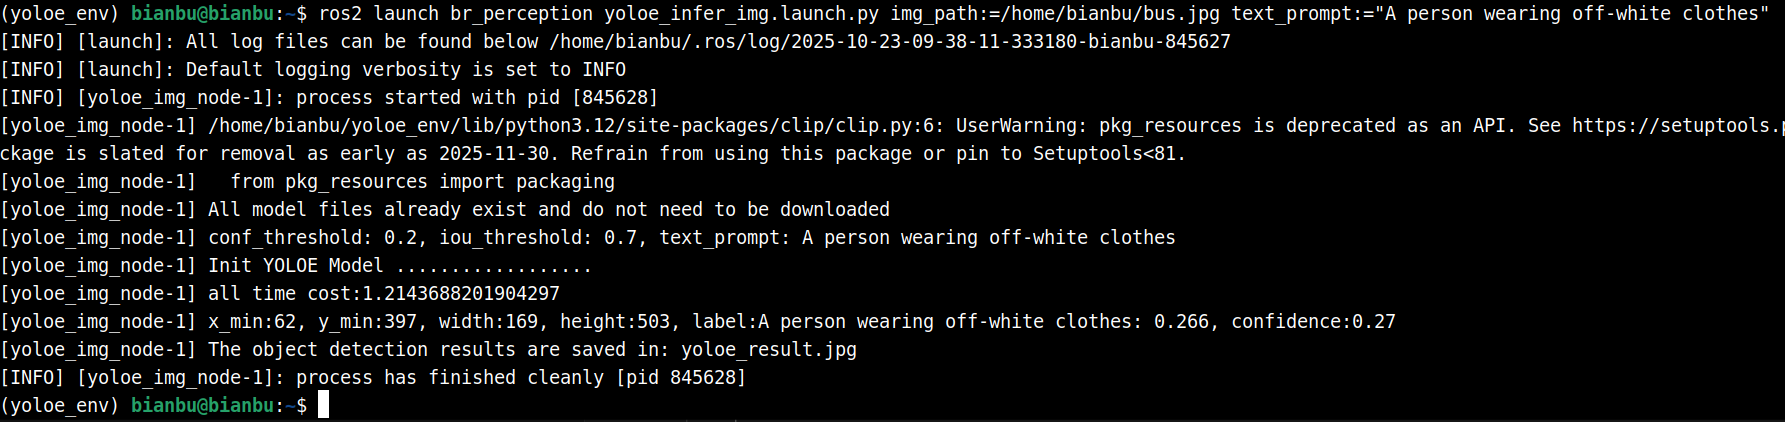
终端打印如下
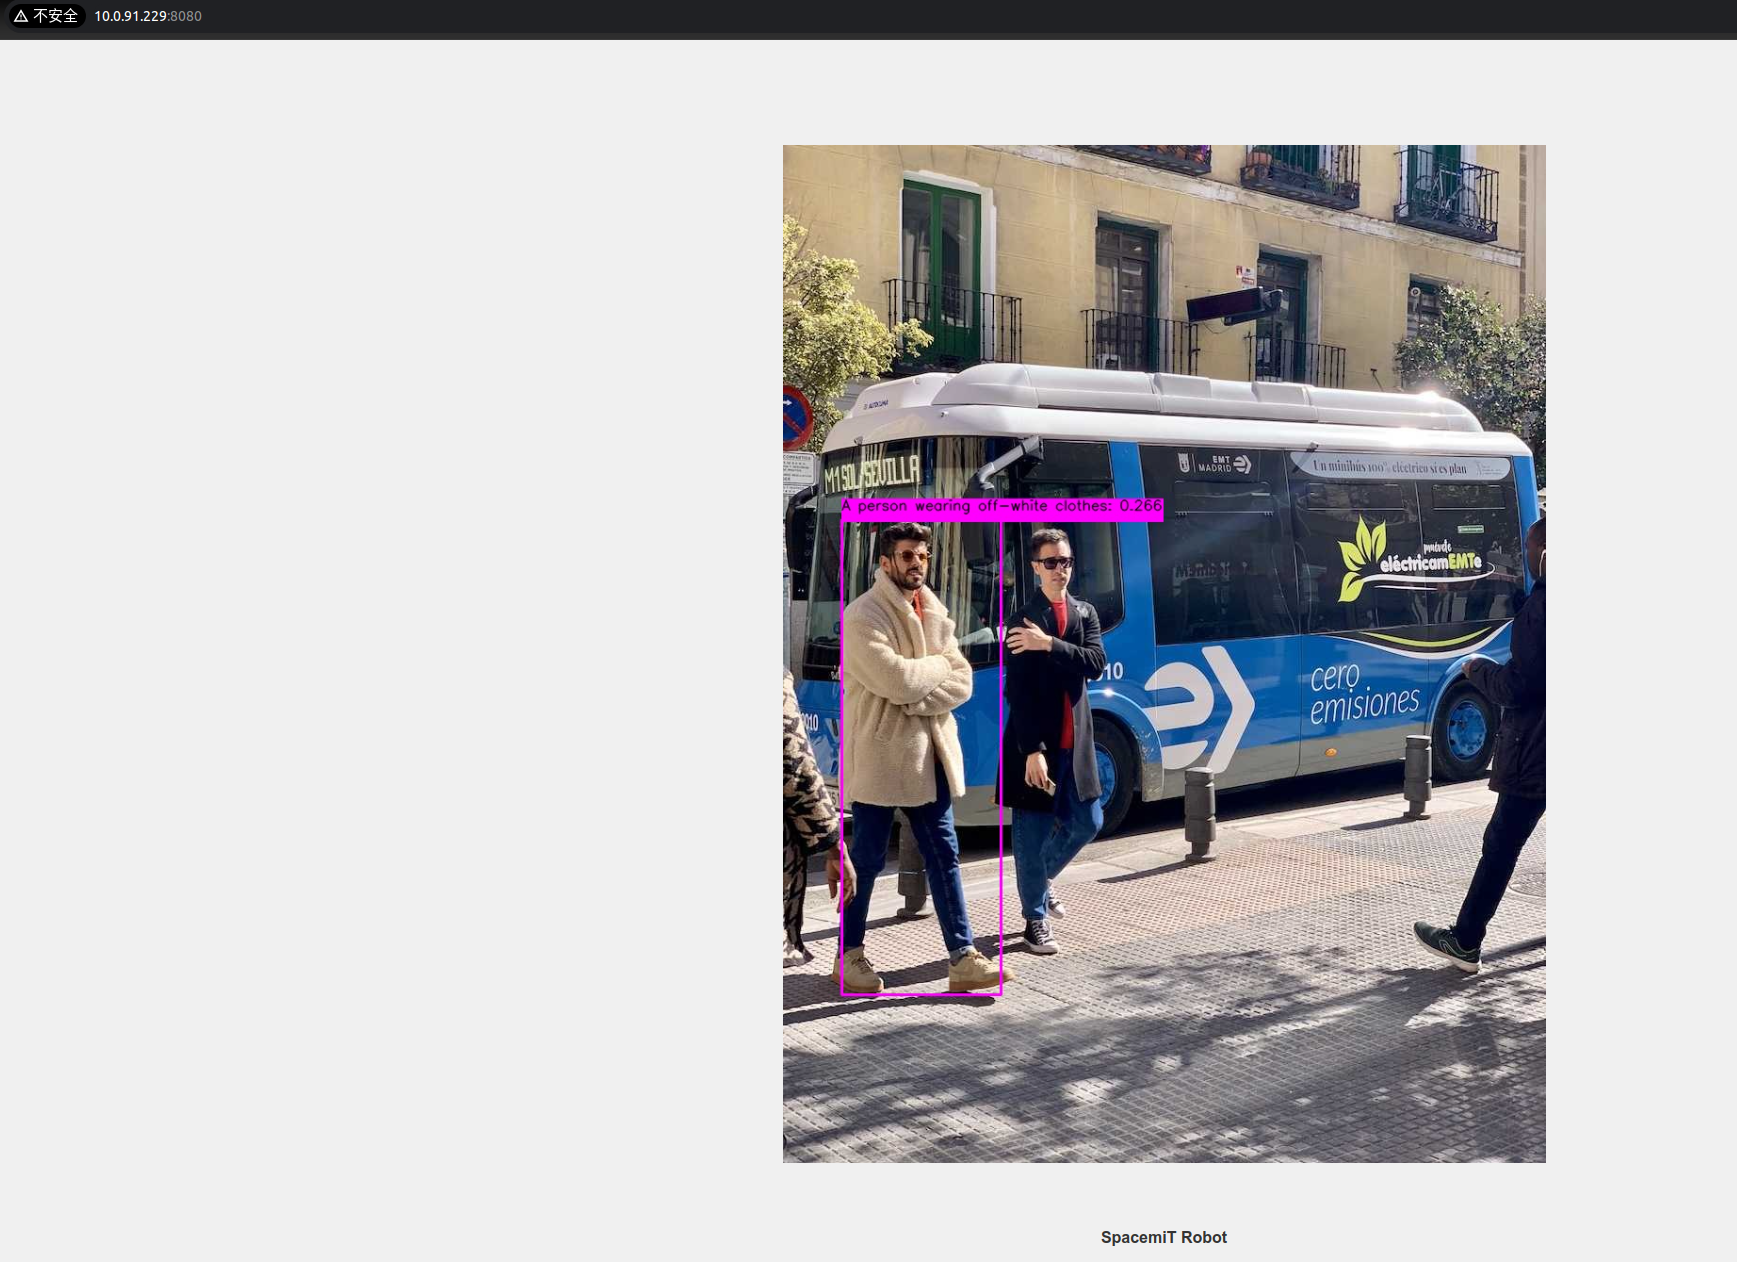
Web 可视化推理结果
启动推理发布节点(终端 1):
ros2 launch rdk_perception yoloe_infer_img.launch.py \
publish_result_img:=true \
img_path:=/home/bianbu/bus.jpg \
text_prompt:="A person wearing off-white clothes"
启动 Web 可视化服务(终端 2):
ros2 launch rdk_visualization websocket_cpp.launch.py image_topic:='/result_img'
终端提示访问地址:
...
Please visit in your browser: http://<IP>:8080
...
打开浏览器输入 http://<IP>:8080,即可查看实时推理图像结果。
还可以通过追加 port:=xxxx 参数来指定端口号,以避免端口冲突
结果订阅
输入 ros2 topic echo /inference_result 查看推理结果话题
使用以下代码实现简单的话题订阅
from rclpy.node import Node
from std_msgs.msg import Header
from jobot_interfaces.msg import DetectionResultArray, DetectionResult
import rclpy

class DetectionSubscriber(Node):
    def __init__(self):
        super().__init__('detection_sub')
        self.subscription = self.create_subscription(
            DetectionResultArray,
            '/inference_result',
            self.listener_callback,
            10)

    def listener_callback(self, msg: DetectionResultArray):
        self.get_logger().info(f"Frame: {msg.header.frame_id}")
        for det in msg.results:
            self.get_logger().info(
                f"[{det.label}] ({det.x_min},{det.y_min}) "
                f"{det.width}x{det.height} conf={det.conf:.2f}"
            )

def main(args=None):
    rclpy.init(args=args)
    node = DetectionSubscriber()
    rclpy.spin(node)
    node.destroy_node()
    rclpy.shutdown()

main()
参数说明
yoloe_infer_img.launch.py 的参数说明
| 参数名称 | 作用 | 默认值 |
|---|---|---|
| img_path | 推理时使用的图片路径 | data//bus.jpg |
| publish_result_img | 是否以图像消息的形式发布推理结果 | false |
| result_img_topic | 发布的渲染图像消息名,publish_result_img为true时才有效 | /result_img |
| result_topic | 发布的推理结果消息名 | /inference_result |
| conf_threshold | 控制检测结果可信度的最低标准(过滤低分框) | 0.2 |
| iou_threshold | 控制去重规则的严格程度(处理重叠框) | 0.7 |
| text_prompt | 控制检测目标的范围(常规类别,或物体的自然语言描述,以,分隔不同类别描述) | "person" |
使用推理服务
推理服务接受原始图像消息和文本提示并返回 YOLOE 推理结果,可以通过 ros2 interface show jobot_interfaces/srv/YOLOEInfer 查看服务定义。
开启服务
source ~/yoloe_env/bin/activate
export PYTHONPATH="$HOME/yoloe_env/lib/python3.12/site-packages":$PYTHONPATH
ros2 launch rdk_perception yoloe_service.launch.py
终端打印:

客户端代码
编写客户端代码
import rclpy
from rclpy.node import Node
from jobot_interfaces.srv import YOLOEInfer
from sensor_msgs.msg import Image
import cv2
from jobot_perception_utils_py.cv_bridge import CvBridge

class TestClient(Node):
    def __init__(self):
        super().__init__('yoloe_test_client')
        self.cli = self.create_client(YOLOEInfer, '/yoloe_infer')
        while not self.cli.wait_for_service(timeout_sec=2.0):
            self.get_logger().info('Waiting for service /yoloe_infer...')
        self.req = YOLOEInfer.Request()
        self.bridge = CvBridge()

    def send_request(self, img_path, text_prompt="person"):
        img = cv2.imread(img_path)
        self.req.image = self.bridge.cv2_to_imgmsg(img, encoding='bgr8')
        self.req.text_prompt = text_prompt
        future = self.cli.call_async(self.req)
        rclpy.spin_until_future_complete(self, future)
        return future.result()

def main():
    rclpy.init()
    client = TestClient()
    resp = client.send_request('bus.jpg', 'person')
    print(f"Detected {len(resp.detections.results)} objects")

    for box in resp.detections.results:
        print(f'x_min:{box.x_min}, y_min:{box.y_min}, width:{box.width}, height:{box.height}, label:{box.label}, confidence:{box.conf:.2f}')

    # ROS Image -> OpenCV
    img_result = client.bridge.imgmsg_to_cv2(resp.result_img, desired_encoding='bgr8')

    cv2.imwrite('yoloe_service_result.jpg', img_result)
    print("The yoloe result are saved in: yoloe_service_result.jpg")

    client.destroy_node()
    rclpy.shutdown()

if __name__ == "__main__":
    main()
注意确保这里的图像路径正确。
请求服务
客户端代码保存为 yoloe_client.py
然后执行:
source ~/yoloe_env/bin/activate
export PYTHONPATH="$HOME/yoloe_env/lib/python3.12/site-packages":$PYTHONPATH
python3 yoloe_client.py
终端打印:

结果可视化文件保存在 yoloe_service_result.jpg
参数说明
yoloe_service.launch.py 的参数说明
| 参数名称 | 作用 | 默认值 |
|---|---|---|
| conf_threshold | 控制检测结果可信度的最低标准(过滤低分框) | 0.2 |
| iou_threshold | 控制去重规则的严格程度(处理重叠框) | 0.7 |