docker-compose Plugin
Bianbu NAS uses the docker-compose tool to deploy Docker services. When one container is not enough for an application, docker-compose helps you manage multiple containers easily.
Start the Docker Service
Before you create a Docker service, make sure the Docker service is running.
For mounting disk and create shared folders, it is highly recommended creating three shared folders, for example:
app_data: to store application dataapp_config: to store configuration filesapp_backup: to store backup files
Now, follow the steps below:
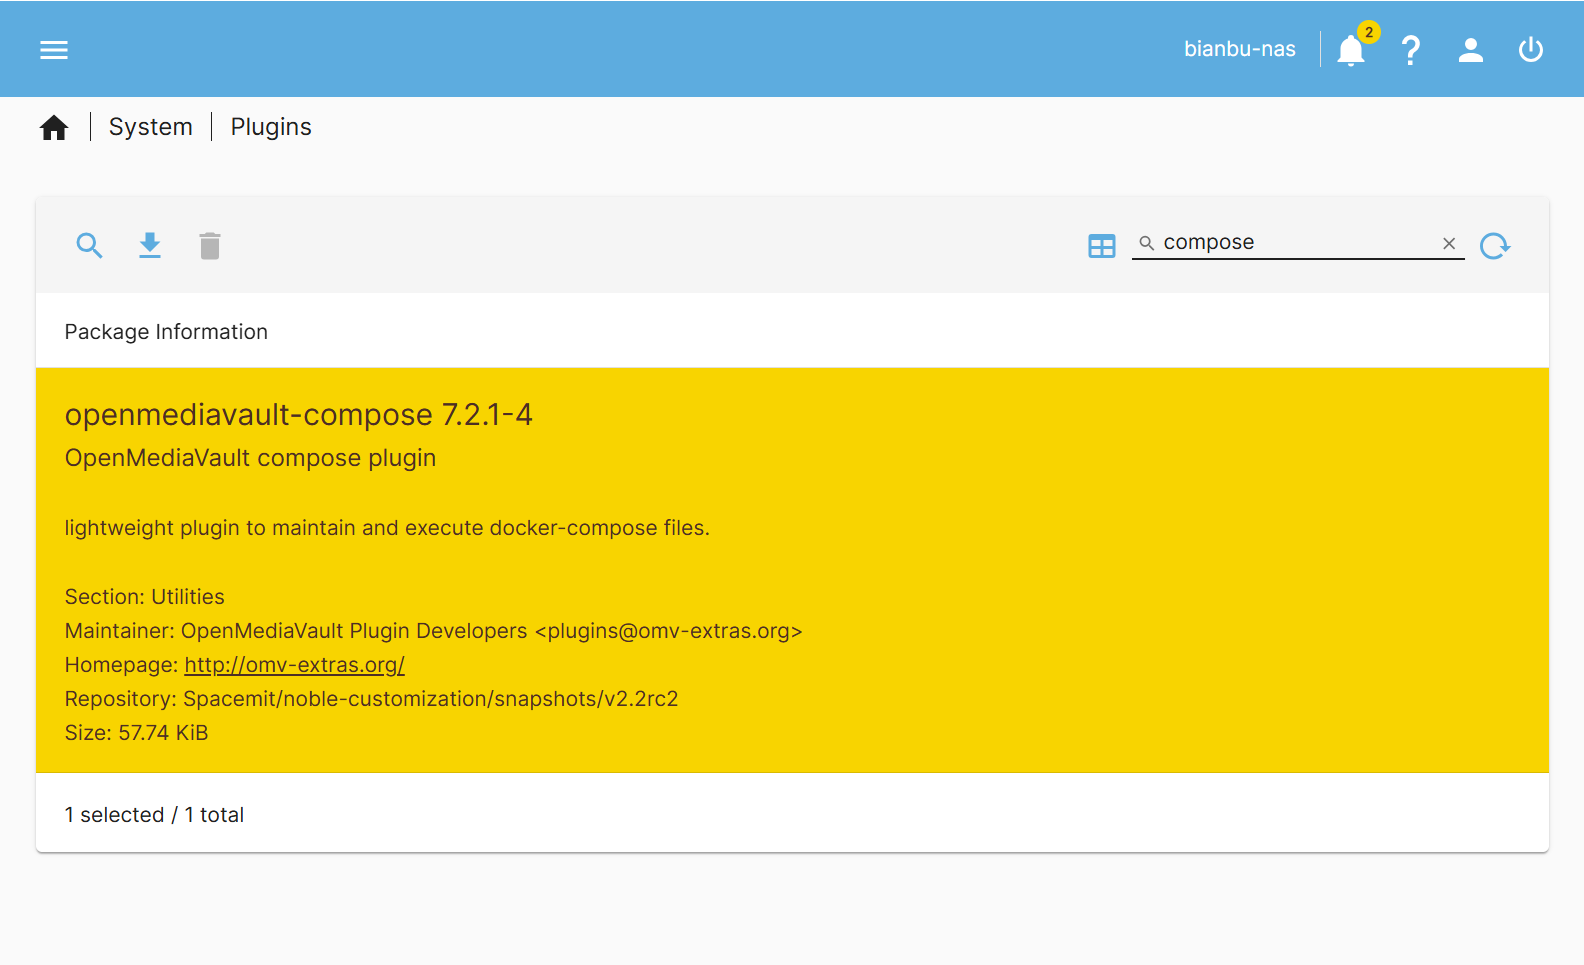
Step 1: Install the compose Plugin
-
Log in to the Bianbu NAS Web interface Openmediavault → Go to Plugins → Search for
compose→ Click to Download and Install. -
After installation, go to the Services page to check if the
composeplugin is active.
Step 2: Set Up and Start Docker
-
Go to Services → Compose → Settings
-
Choose the shared folder you created
-
Click Save to start the Docker service

Create a Docker Service Instance
Let’s use Filebrowser (a web-based file manager) as an example to show how to create and access a Docker service.
Step 1: Add the docker-compose.yml File
- Go to Services → Compose → Files
- Click the
 button to create a new
 docker-compose.ymlfile:

- Paste the following content:
version: '3.8'

services:
  filebrowser:
    image: harbor.spacemit.com/application/filebrowser:2.28.0
    container_name: filebrowser
    volumes:
      - ./filebrowser_data:/srv        # Mount the files to the host directory
      - ./filebrowser_config:/config   # Configuration file directory
    ports:
      - "8080:8080"                      # Map port 8080 to the container's port 8080
    restart: unless-stopped
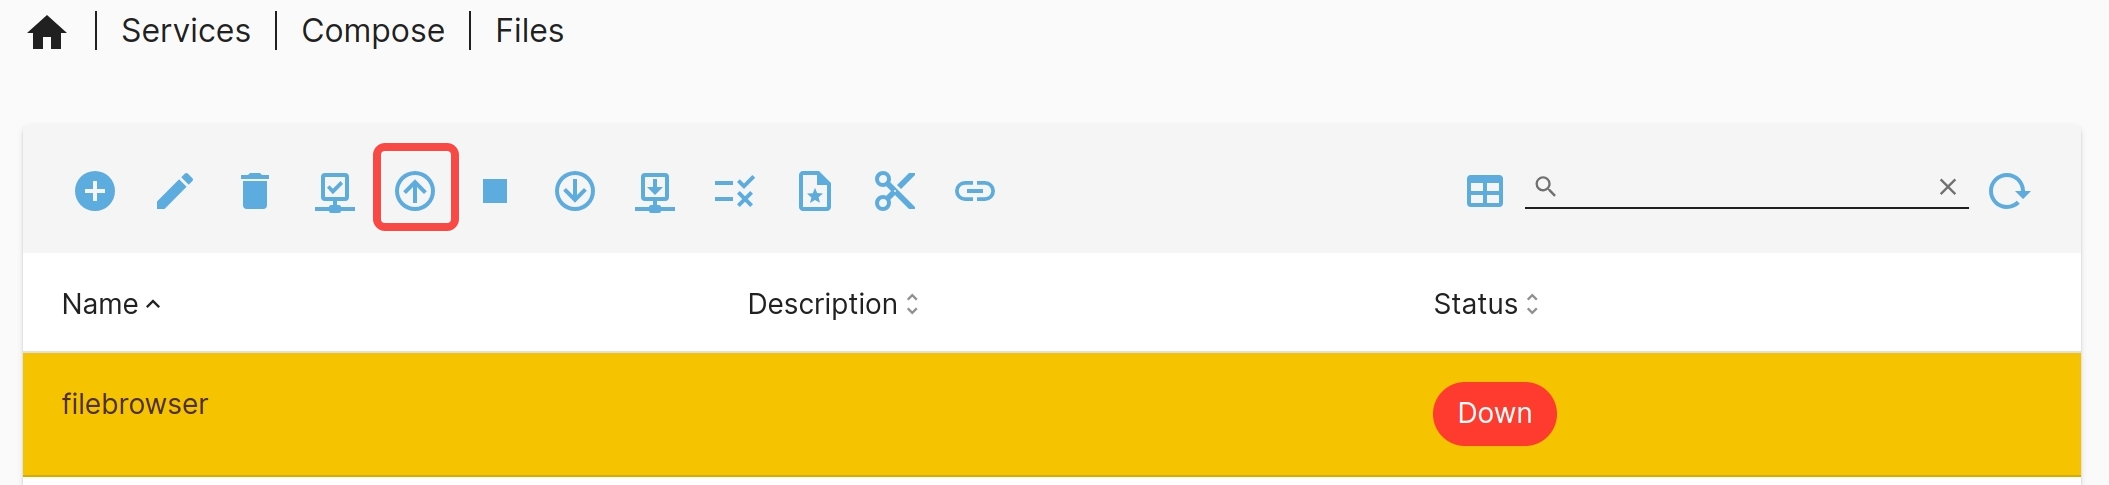
Step 2: Deploy the Service
- After filling in the content, click "Save" and wait for the docker-compose.yml file format to be checked.
- If everything is correct, click the "⬆️" button to pull the image and start the service.
Step 3: Access the Service
- If it's your first time pulling the image, it may take some time to download.
- Once started, open your browser and go to:
http://HOST_IP:8080(replaceHOST_IPwith your NAS IP) The default username and password are bothadmin.
docker-compose Command Guide
These actions can be done with buttons in the web interface, so you don’t need to type commands.
docker-compose up

Reads the docker-compose.yml file, pull images (if not available locally), create networks, containers, and volumes, then start the service.
docker-compose stop

Stop running containers while preserving their state and data. However it can be restored using the docker-compose up command.
docker-compose down

Stop containers and remove related data such as containers, networks, and volumes.
⚠️ Warning: This cannot be undone with the docker-compose up command. Make sure you back up your data first!
View service logs

Check live logs to see what’s happening with your service.