JupyterLab User Guide
Last Version: 10/09/2025
This guide shows how to run JupyterLab in a Docker container on Bianbu systems.
Pull the Base Image
Download the latest JupyterLab image
sudo docker pull harbor.spacemit.com/bianbu-robot/jupyterlab-py312:latest
Start JupyterLab
Method 1: Quick Start
This method starts a temporary container that will be automatically removed when stopped.
First, create a folder to share notebooks:
mkdir jupyter-share && cd jupyter-share/
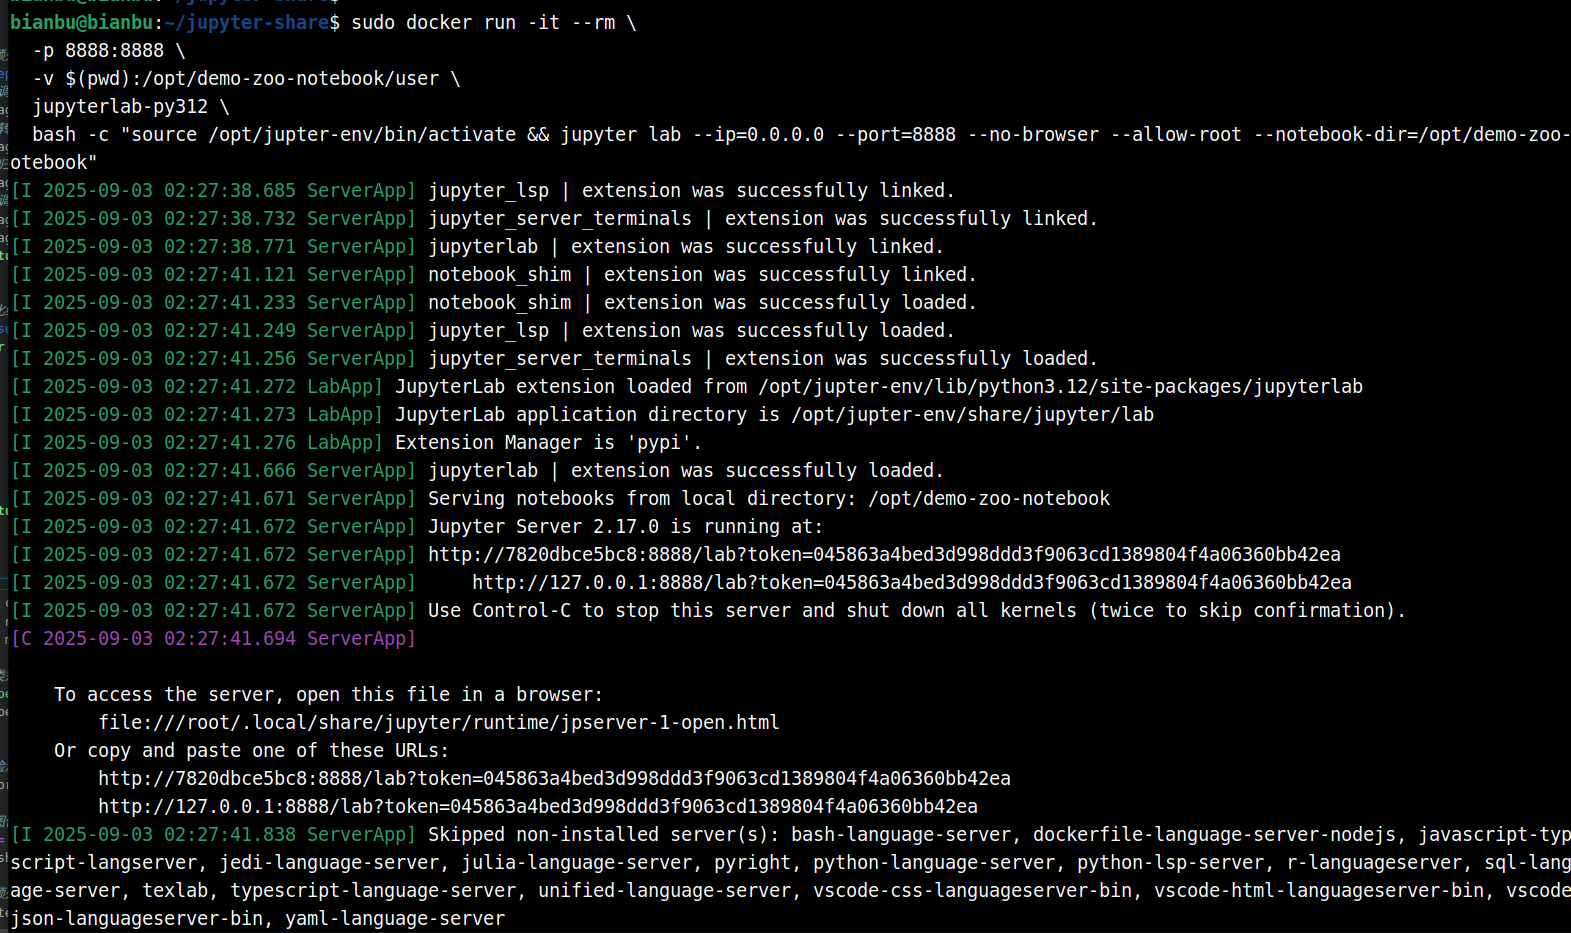
Then, run the container:
sudo docker run -it --rm \
  -p 8888:8888 \
  -v $(pwd):/opt/demo-zoo-notebook/user \
  harbor.spacemit.com/bianbu-robot/jupyterlab-py312 \
  bash -c "source /opt/jupter-env/bin/activate && jupyter lab --ip=0.0.0.0 --port=8888 --no-browser --allow-root --notebook-dir=/opt/demo-zoo-notebook"
Command breakdown
docker runRuns a container. If the image isn’t available locally, it will be downloaded first.-itOpens an interactive terminal so you can see the container’s output in real time.--rmAutomatically removes the container when it exits. Ideal for quick testing.-p 8888:8888Maps port8888on your local machine to port8888inside the container.-v $(pwd):/opt/demo-zoo-notebook/userMounts the current directory to/opt/demo-zoo-notebook/userin the container for easy file sharing.harbor.spacemit.com/bianbu-robot/jupyterlab-py312Specifies the base image to use.bash -c ...The command to start JupyterLab. For container customization, you can enter the container first and then run this command.
Terminal output example:
To access JupyterLab:
-
Copy the URL:
http://127.0.0.1:8888/lab?token=045863a4bed3d998ddd3f9063cd1389804f4a06360bb42ea -
Replace
127.0.0.1with your board’s IP address. For example: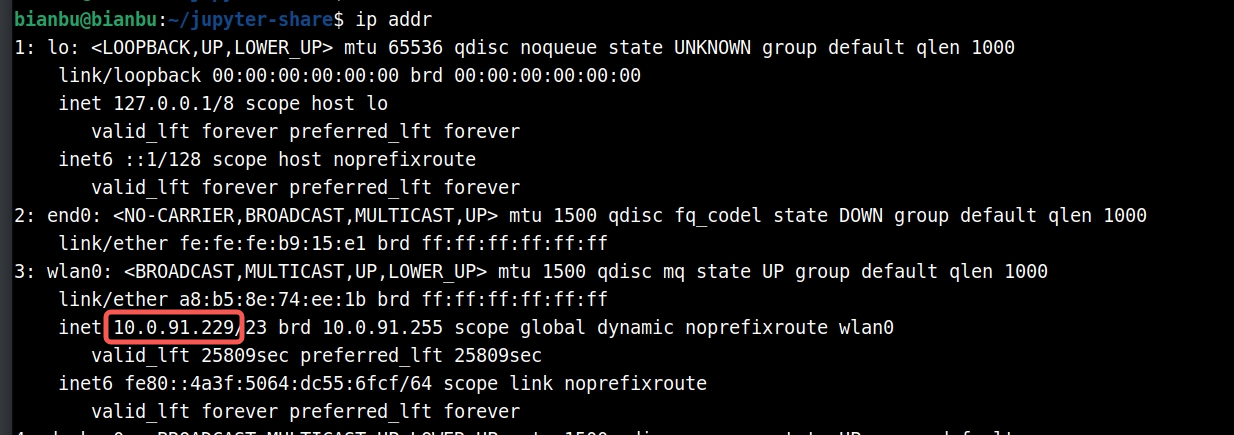
If the board’s IP is
10.0.91.229, the URL becomes:http://10.0.91.229:8888/lab?token=045863a4bed3d998ddd3f9063cd1389804f4a06360bb42ea -
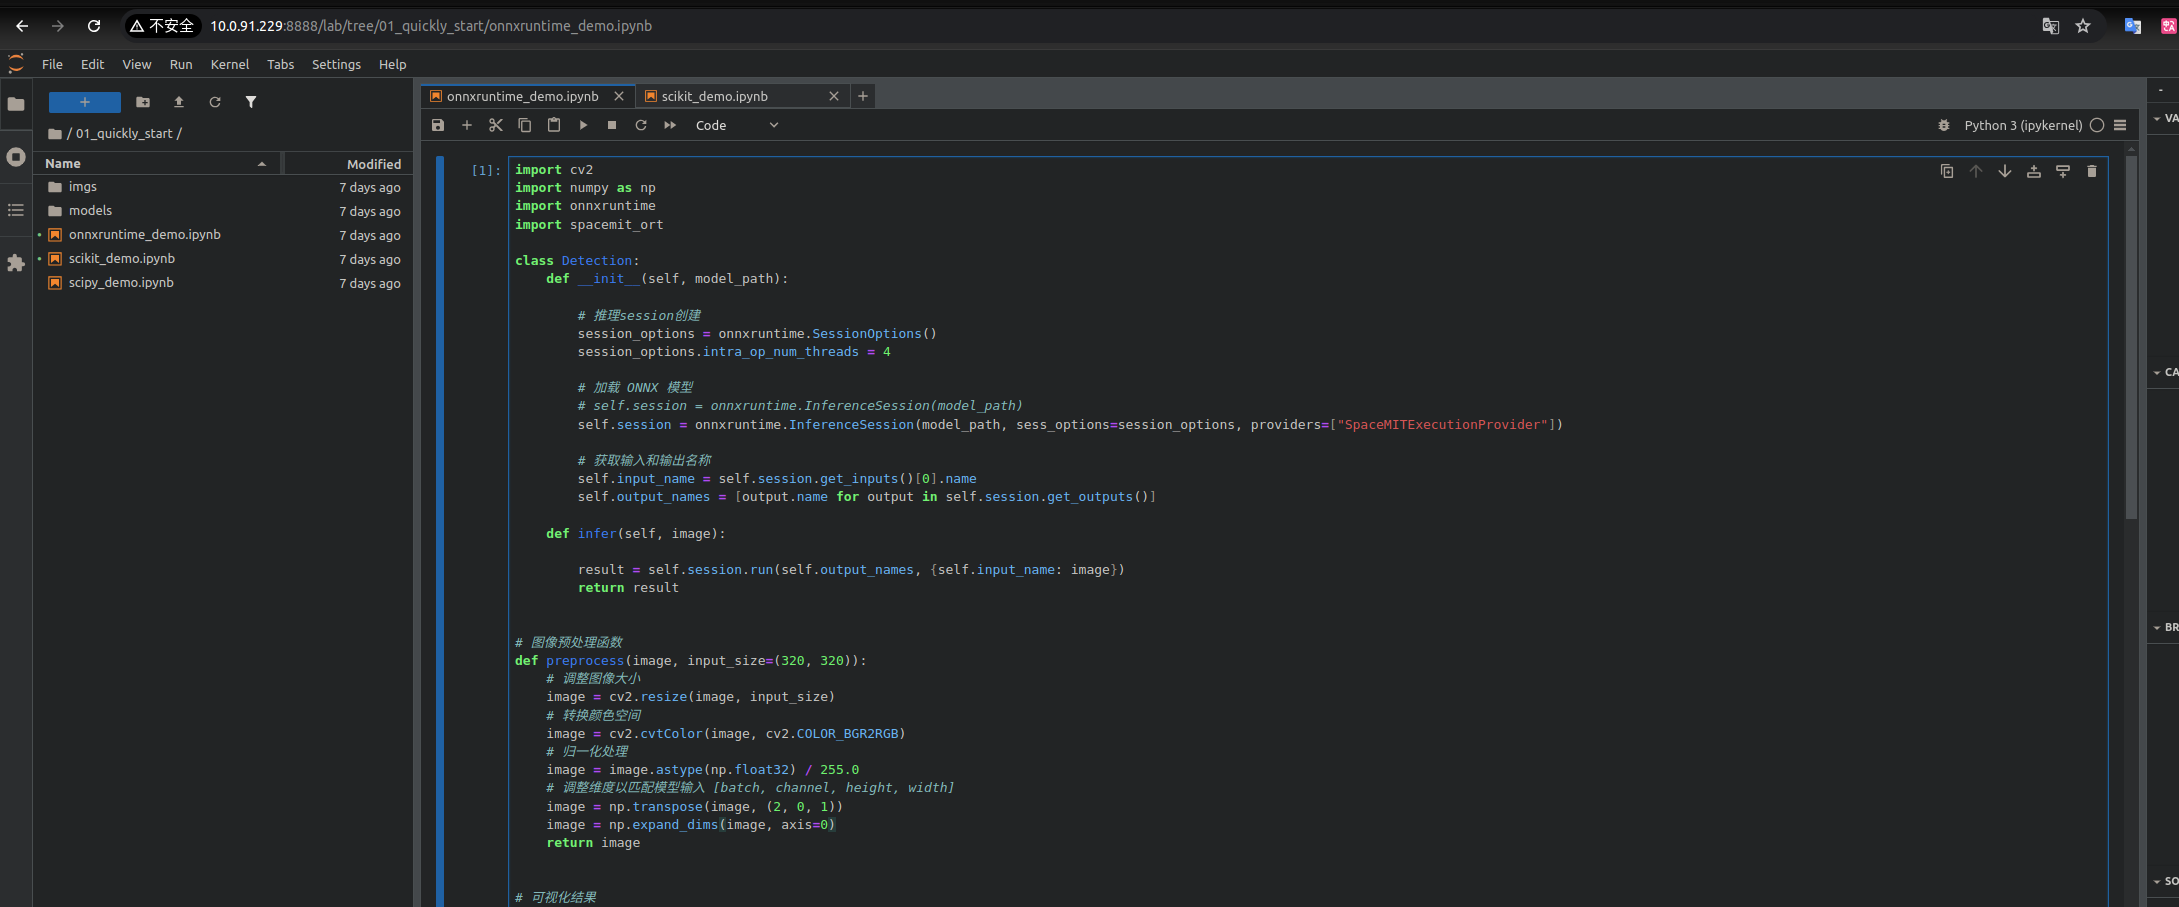
Access it from an x86 PC:
http://10.0.91.229:8888/lab?token=045863a4bed3d998ddd3f9063cd1389804f4a06360bb42eaThe JupyterLab interface will look like this:
Note: The container will be removed once you exit the terminal.
As shown above, the container includes several quick-start examples. You can run them to explore JupyterLab�’s features.
Method 2: Background Container (For customization)
Use this method if you need to modify the container or keep it running persistently.
-
Create the container in background
sudo docker run -itd \
  -p 8888:8888 \
  -v $(pwd):/opt/demo-zoo-notebook/user \
  --name jupyterlab-py312 \
  harbor.spacemit.com/bianbu-robot/jupyterlab-py312
Verify the container is running:
sudo docker ps -aExample output:

-
Start JupyterLab service inside the container
sudo docker exec -it jupyterlab-py312 bashActivate the virtual environment:
source /opt/jupter-env/bin/activateExample output:

Start JupyterLab, run:
jupyter lab --ip=0.0.0.0 --port=8888 --no-browser --allow-root --notebook-dir=/opt/demo-zoo-notebook
Accessing JupyterLab (Same for both methods)
Once JupyterLab is running (using either method), access it by:
- Get the access URL from the terminal output
- Replace
127.0.0.1with your board's actual IP address - Open the URL in your web browser on your PC
You can follow the official Jupyter documentation to learn more features.